Terraform Overview
Terraform#
Why use Terraform#
When dealing with procedural code, the state of the infrastructure is not fully captured in the code The reusability of procedural code is inherently limited because you have to manually take into account the current state of the codebase
With Terraform all you need to look at is the code: to know the current state of you infrastructure and how it was configured.
Meaning that Terraform codebases tend to stay small and easy to understand
The downside is there is no logic and control - loops and if statements. Rolling, zero-downtime deployment, are hard to express in purely declarative terms.
Stability: It’s still pre 1.0.0, so there is no guarantee of a stable or backward compatible API - bugs are relatively common (Terraforms biggest weakness)
Configuration#
The set of files used to describe infrastructure in Terraform is simply known as a Terraform configuration
It uses it’s own configuration language although it can also be json but json is recommended when configuration is generated by a machine.
The files end in *.tf, terraform will load all of them with that extension.
For example.tf:
provider "aws" {
  profile    = "default"
  region     = "us-east-1"
}

resource "aws_instance" "example" {
  ami           = "ami-2757f631"
  instance_type = "t2.micro"
}
It is HashiCorp recommended practice that credentials never be hardcoded into *.tf configuration files, the profile attribute refers to the AWS credentials file.
Tutorial#
To verify the correct provider details install the aws cli with:
pip3 install awscli
then run:
aws configure
Create or view your credentials at iam home
That will create your credentials in ~/.aws/
In example.tf:
provider "aws" {
  profile    = "default"
  region     = "eu-west-2"
}

resource "aws_instance" "example" {
  ami           = "ami-0c30afcb7ab02233d"
  instance_type = "t2.micro"
}
The provider block…configures the provider.
The resource block defines a resource that exists within an infrastructure.
The resource blocks specifies the resource type: aws_instance and the resource name example
The prefix of type maps to a provider.
Within the resource block is the configuration for that resource based on the provider
The AMI is specified for ubuntu and the instance_type is t2.micro
Initialisation#
The first command to run is: terraform init
each “Provider” is its own encapsulated binary distributed separately from Terraform itself
Init will download the provider binary
The aws provider plugin is downloaded and installed in a subdirectory of the current working directory, along with various other book-keeping files. In a hidden folder
Then to view what is going to happen run
terraform plan
this will show you what the command will do:
An execution plan has been generated and is shown below.
Resource actions are indicated with the following symbols:
+ create

Terraform will perform the following actions:

# aws_instance.example will be created
+ resource "aws_instance" "example" {
    + ami                          = "ami-2757f631"
    + arn                          = (known after apply)
    + associate_public_ip_address  = (known after apply)
    + availability_zone            = (known after apply)
    + cpu_core_count               = (known after apply)
    + cpu_threads_per_core         = (known after apply)
    + get_password_data            = false
    + host_id                      = (known after apply)
    + id                           = (known after apply)
    + instance_state               = (known after apply)
    + instance_type                = "t2.micro"
    + ipv6_address_count           = (known after apply)
    + ipv6_addresses               = (known after apply)
    + key_name                     = (known after apply)
    + network_interface_id         = (known after apply)
    + password_data                = (known after apply)
    + placement_group              = (known after apply)
    + primary_network_interface_id = (known after apply)
    + private_dns                  = (known after apply)
    + private_ip                   = (known after apply)
    + public_dns                   = (known after apply)
    + public_ip                    = (known after apply)
    + security_groups              = (known after apply)
    + source_dest_check            = true
    + subnet_id                    = (known after apply)
    + tenancy                      = (known after apply)
    + volume_tags                  = (known after apply)
    + vpc_security_group_ids       = (known after apply)

    + ebs_block_device {
        + delete_on_termination = (known after apply)
        + device_name           = (known after apply)
        + encrypted             = (known after apply)
        + iops                  = (known after apply)
        + snapshot_id           = (known after apply)
        + volume_id             = (known after apply)
        + volume_size           = (known after apply)
        + volume_type           = (known after apply)
        }

    + ephemeral_block_device {
        + device_name  = (known after apply)
        + no_device    = (known after apply)
        + virtual_name = (known after apply)
        }

    + network_interface {
        + delete_on_termination = (known after apply)
        + device_index          = (known after apply)
        + network_interface_id  = (known after apply)
        }

    + root_block_device {
        + delete_on_termination = (known after apply)
        + iops                  = (known after apply)
        + volume_id             = (known after apply)
        + volume_size           = (known after apply)
        + volume_type           = (known after apply)
        }
    }
The + means create (similar to git diff)
The (known after apply) means that the value has not been set and will be known after applying changes
terraform apply will run a plan anyway and then ask for approval - kind of like a network config commit.
Type yes to proceed
You might get an error:
Error: Error launching source instance: InvalidAMIID.NotFound: The image id '[ami-2757f631]' does not exist
        status code: 400, request id: 3ff4f7b9-22ab-4ca8-b245-1f9a97ce4547
I searched aws and changed the AMI
It will create the instance:
aws_instance.example: Creating...
aws_instance.example: Still creating... [10s elapsed]
aws_instance.example: Still creating... [20s elapsed]
aws_instance.example: Still creating... [30s elapsed]
aws_instance.example: Creation complete after 31s [id=i-0499e86428cd7ac4a]

Apply complete! Resources: 1 added, 0 changed, 0 destroyed.
You will see the EC2 instance now.
Terraform also wrote some data into terraform.tfstate, this file is very important it keeps track of ID’s of created resources so Terraform knows what it is managing.
This file must be saved and distributed to anyone who might run Terraform
By default the state is stored locally but when working in a team you should setup remote state.
State#
You can inspect the current state with
terraform show

resource "aws_instance" "example" {
    ami                          = "ami-0c30afcb7ab02233d"
    arn                          = "arn:aws:ec2:eu-west-2:632637550757:instance/i-0499e86428cd7ac4a"
    associate_public_ip_address  = true
    availability_zone            = "eu-west-2a"
    cpu_core_count               = 1
    cpu_threads_per_core         = 1
    disable_api_termination      = false
    ebs_optimized                = false
    get_password_data            = false
    id                           = "i-0499e86428cd7ac4a"
    instance_state               = "running"
    instance_type                = "t2.micro"
    ipv6_address_count           = 0
    ipv6_addresses               = []
    monitoring                   = false
    primary_network_interface_id = "eni-0cbe48527b1b1ec8d"
    private_dns                  = "ip-172-31-19-140.eu-west-2.compute.internal"
    private_ip                   = "172.31.19.140"
    public_dns                   = "ec2-3-8-150-188.eu-west-2.compute.amazonaws.com"
    public_ip                    = "3.8.150.188"
    security_groups              = [
        "default",
    ]
    source_dest_check            = true
    subnet_id                    = "subnet-c13c8ebb"
    tenancy                      = "default"
    volume_tags                  = {}
    vpc_security_group_ids       = [
        "sg-e6ae0689",
    ]

    credit_specification {
        cpu_credits = "standard"
    }

    root_block_device {
        delete_on_termination = true
        iops                  = 100
        volume_id             = "vol-03cec4b79fbfcb58b"
        volume_size           = 8
        volume_type           = "gp2"
    }
}
If no additional software is needed (an image based infrastructure) this is all you need.
Change Infrastructure#
Lets modify the resource
By using Terraform to change infrastructure, you can version control not only your configurations but also your state so you can see how the infrastructure evolved over time
We are going to change the AMI to be ubuntu 16…
Changing the example config to:
provider "aws" {
  profile    = "default"
  region     = "eu-west-2"
}

resource "aws_instance" "example" {
  ami           = "ami-0cbe2951c7cd54704"
  instance_type = "t2.micro"
}
Terraform will show you the changes:
aws_instance.example: Refreshing state… [id=i-0499e86428cd7ac4a]
An execution plan has been generated and is shown below. Resource actions are indicated with the following symbols: -/+ destroy and then create replacement
Terraform will perform the following actions:
aws_instance.example must be replaced#
-/+ resource "aws_instance" "example" {
    ~ ami                          = "ami-0c30afcb7ab02233d" -> "ami-0cbe2951c7cd54704" # forces replacement
    ~ arn                          = "arn:aws:ec2:eu-west-2:632637550757:instance/i-0499e86428cd7ac4a" -> (known after apply)
    ~ associate_public_ip_address  = true -> (known after apply)
    ~ availability_zone            = "eu-west-2a" -> (known after apply)
    ~ cpu_core_count               = 1 -> (known after apply)
    ~ cpu_threads_per_core         = 1 -> (known after apply)
    - disable_api_termination      = false -> null
    - ebs_optimized                = false -> null
        get_password_data            = false
    + host_id                      = (known after apply)
    ~ id                           = "i-0499e86428cd7ac4a" -> (known after apply)
    ~ instance_state               = "running" -> (known after apply)
        instance_type                = "t2.micro"
    ~ ipv6_address_count           = 0 -> (known after apply)
    ~ ipv6_addresses               = [] -> (known after apply)
    + key_name                     = (known after apply)
    - monitoring                   = false -> null
    + network_interface_id         = (known after apply)
    + password_data                = (known after apply)
    + placement_group              = (known after apply)
    ~ primary_network_interface_id = "eni-0cbe48527b1b1ec8d" -> (known after apply)
    ~ private_dns                  = "ip-172-31-19-140.eu-west-2.compute.internal" -> (known after apply)
    ~ private_ip                   = "172.31.19.140" -> (known after apply)
    ~ public_dns                   = "ec2-3-8-150-188.eu-west-2.compute.amazonaws.com" -> (known after apply)
    ~ public_ip                    = "3.8.150.188" -> (known after apply)
    ~ security_groups              = [
        - "default",
        ] -> (known after apply)
        source_dest_check            = true
    ~ subnet_id                    = "subnet-c13c8ebb" -> (known after apply)
    - tags                         = {} -> null
    ~ tenancy                      = "default" -> (known after apply)
    ~ volume_tags                  = {} -> (known after apply)
    ~ vpc_security_group_ids       = [
        - "sg-e6ae0689",
        ] -> (known after apply)

    - credit_specification {
        - cpu_credits = "standard" -> null
        }

    + ebs_block_device {
        + delete_on_termination = (known after apply)
        + device_name           = (known after apply)
        + encrypted             = (known after apply)
        + iops                  = (known after apply)
        + snapshot_id           = (known after apply)
        + volume_id             = (known after apply)
        + volume_size           = (known after apply)
        + volume_type           = (known after apply)
        }

    + ephemeral_block_device {
        + device_name  = (known after apply)
        + no_device    = (known after apply)
        + virtual_name = (known after apply)
        }

    + network_interface {
        + delete_on_termination = (known after apply)
        + device_index          = (known after apply)
        + network_interface_id  = (known after apply)
        }

    ~ root_block_device {
        ~ delete_on_termination = true -> (known after apply)
        ~ iops                  = 100 -> (known after apply)
        ~ volume_id             = "vol-03cec4b79fbfcb58b" -> (known after apply)
        ~ volume_size           = 8 -> (known after apply)
        ~ volume_type           = "gp2" -> (known after apply)
        }
    }

Plan: 1 to add, 0 to change, 1 to destroy.
-/+means destroy and recreate~means update in place
you can adjust your changes to possibly avoid destroy/create updates if they are not acceptable in some situations
As indicated by the plan, terraform destroyed the existing instance before creating a new one
aws_instance.example: Destroying... [id=i-0499e86428cd7ac4a]
aws_instance.example: Still destroying... [id=i-0499e86428cd7ac4a, 10s elapsed]
aws_instance.example: Still destroying... [id=i-0499e86428cd7ac4a, 20s elapsed]
aws_instance.example: Destruction complete after 23s
aws_instance.example: Creating...
aws_instance.example: Still creating... [10s elapsed]
aws_instance.example: Still creating... [20s elapsed]
aws_instance.example: Still creating... [30s elapsed]
aws_instance.example: Creation complete after 30s [id=i-017faa6d016ae580b]
You can run terraform show to view the current state again.
Destroy Infrastrcture#
Destroying your infrastructure is a rare event in production environments. But if you’re using Terraform to spin up multiple environments such as development, test, QA environments, then destroying is a useful action.
terraform destroy
Similar to terraform apply but it behaves as if all of the resources have been removed from the configuration.
An execution plan has been generated and is shown below.
Resource actions are indicated with the following symbols:
- destroy

Terraform will perform the following actions:

# aws_instance.example will be destroyed
- resource "aws_instance" "example" {
    - ami                          = "ami-0cbe2951c7cd54704" -> null
    - arn                          = "arn:aws:ec2:eu-west-2:632637550757:instance/i-017faa6d016ae580b" -> null
    - associate_public_ip_address  = true -> null
    - availability_zone            = "eu-west-2a" -> null
    - cpu_core_count               = 1 -> null
    - cpu_threads_per_core         = 1 -> null
    - disable_api_termination      = false -> null
    - ebs_optimized                = false -> null
    - get_password_data            = false -> null
    - id                           = "i-017faa6d016ae580b" -> null
    - instance_state               = "running" -> null
    - instance_type                = "t2.micro" -> null
    - ipv6_address_count           = 0 -> null
    - ipv6_addresses               = [] -> null
    - monitoring                   = false -> null
    - primary_network_interface_id = "eni-03fd81e9df8b53966" -> null
    - private_dns                  = "ip-172-31-17-251.eu-west-2.compute.internal" -> null
    - private_ip                   = "172.31.17.251" -> null
    - public_dns                   = "ec2-35-177-103-61.eu-west-2.compute.amazonaws.com" -> null
    - public_ip                    = "35.177.103.61" -> null
    - security_groups              = [
        - "default",
        ] -> null
    - source_dest_check            = true -> null
    - subnet_id                    = "subnet-c13c8ebb" -> null
    - tags                         = {} -> null
    - tenancy                      = "default" -> null
    - volume_tags                  = {} -> null
    - vpc_security_group_ids       = [
        - "sg-e6ae0689",
        ] -> null

    - credit_specification {
        - cpu_credits = "standard" -> null
        }

    - root_block_device {
        - delete_on_termination = true -> null
        - iops                  = 100 -> null
        - volume_id             = "vol-005ebba18b00b544a" -> null
        - volume_size           = 8 -> null
        - volume_type           = "gp2" -> null
        }
    }
Just like with apply, Terraform determines the order in which things must be destroyed. In this case there was only one resource, so no ordering was necessary. In more complicated cases with multiple resources, Terraform will destroy them in a suitable order to respect dependencies, as we’ll see later in this guide.
Resource Dependencies#
Real infrastructure has a diverse set of resources and types. Terraform configs can have multiple resources and types among many providers.
Elastic IP#
We can assign an elastic ip with:
resource "aws_eip" "ip" {
  instance = aws_instance.example.id
}
It is a aws_eip resource type. The only parameter for aws_eip is instance.
Do an apply:
terraform apply
The output will be:
# aws_eip.ip will be created
+ resource "aws_eip" "ip" {
    + allocation_id     = (known after apply)
    + association_id    = (known after apply)
    + domain            = (known after apply)
    + id                = (known after apply)
    + instance          = (known after apply)
    + network_interface = (known after apply)
    + private_dns       = (known after apply)
    + private_ip        = (known after apply)
    + public_dns        = (known after apply)
    + public_ip         = (known after apply)
    + public_ipv4_pool  = (known after apply)
    + vpc               = (known after apply)
    }

# aws_instance.example will be created
+ resource "aws_instance" "example" {
    + ami                          = "ami-0cbe2951c7cd54704"
    + arn                          = (known after apply)
Terraform knows to create the EC2 instance before creating the elastic ip address - it can infer a dependency:
aws_instance.example: Creating...
aws_instance.example: Still creating... [10s elapsed]
aws_instance.example: Still creating... [20s elapsed]
aws_instance.example: Still creating... [30s elapsed]
aws_instance.example: Still creating... [40s elapsed]
aws_instance.example: Creation complete after 41s [id=i-02f0557a715578b7a]
aws_eip.ip: Creating...
aws_eip.ip: Creation complete after 3s [id=eipalloc-09890fe6be9a7ba9a]
Implicit and Explicit Dependencies#
The reference to aws_instance.example.id created an implicit dependency
Terraform then knows what the order should be
Implicit dependencies via interpolation expressions are the primary way to inform Terraform about these relationships, and should be used whenever possible.
Sometimes there are dependencies not visible to terraform, in that case you use depends_on argument accepted by any resource and this is a list of resources to create explicit dependencies for.
For example a the application on an EC2 instance expects to use a specific S3 bucket.
So we use depends_on to ensure Terraform knows about it.
# New resource for the S3 bucket our application will use.
resource "aws_s3_bucket" "example" {
  # NOTE: S3 bucket names must be unique across _all_ AWS accounts, so
  # this name must be changed before applying this example to avoid naming
  # conflicts.
  bucket = "terraform-getting-started-guide"
  acl    = "private"
}

# Change the aws_instance we declared earlier to now include "depends_on"
resource "aws_instance" "example" {
  ami           = "ami-2757f631"
  instance_type = "t2.micro"

  # Tells Terraform that this EC2 instance must be created only after the
  # S3 bucket has been created.
  depends_on = [aws_s3_bucket.example]
}
Where there is no dependencies terraform will perform operations concurrently
Provision#
Using provisioners to intialise instances when they are created.
If you are using an image based infrastructure (created with packer) then what we have learnt so far is enough.
If however you need to do some initial setup on your instances, then provisioners let you upload files, run shell scripts or trigger config management tools
Defining a Provisioner#
Add a provisioner block within the resource block.
resource "aws_instance" "example" {
  ami           = "ami-b374d5a5"
  instance_type = "t2.micro"

  provisioner "local-exec" {
    command = "echo ${aws_instance.example.public_ip} > ip_address.txt"
  }
}
You can add multiple provisioner blocks within the resource block - defining multiple provisioning steps.
Terraform supports multiple provisioners
We’ll use local-exec which runs a command locally on the machine running terraform. (We’re using this provisioner as you don’t need to add connection info)
Running Provisioners#
Provisioners are only run when a resource is created
They are not a replacement for configuration management and changing the software of an already-running server, and are instead just meant as a way to bootstrap a server
Top tip: There is a vscode Terraform extension available for terraform autocomplete and syntax highlighting
This added the ip address to a file…you can view the ip address with:
$ cat ip_address.txt 35.178.204.26
Failed Provisioners and Tainted Resources#
If a resource successfully creates but fails during provisioning, Terraform will error and mark the resource as “tainted”. Meaning provisioning was successful but configuration failed.
On your next execution plan terraform will not attempt to restart provisioning on the tainted resource. Instead, Terraform will remove any tainted resources and create new resources, attempting to provision them again after creation.
No roll backs are done as that goes against the execution plan.
Destroy Provisioners#
Provisioners can also be defined that run only during a destroy operation - useful for cleanups and extracting data.
For many resources, using built-in cleanup mechanisms is recommended if possible (such as init scripts), but provisioners can be used if necessary.
Input Variables#
We’re still hard-coding access keys, AMIs, etc. To become truly shareable and version controlled, we need to parameterize the configurations.
Defining Variables#
Create a file variables.tf:
variable "region" {
  default = "eu-west-2"
}
It sets the default of the region variable, but will prompt you for the region.
Using variables in configuration#
provider "aws" {
    region = var.region
}
Assigning Variables#
Command line arguments:
terraform apply -var 'region=us-east-2'
From a file:
Create a file names terraform.tfvars:
region = "us-east-2"
Terraform will automatically load
terraform.tfvarsor*.auto.tfvarsto populate variablesWe don’t recommend saving usernames and password to version control, but you can create a local secret variables file and use
-var-fileto load it.
terraform apply -var-file="secret.tfvars" -var-file="production.tfvars"
From environment variables:
Terraform reads environment variables in the form of: TF_VAR_name
So a TF_VAR_region environment variable would populate region
Environment variables can only populate string-type variables. List and map type variables must be populated via one of the other mechanisms.
From the UI:
If you execute terraform apply with certain variables not specified, terraform will ask you to input their values interactively.
variables entered via the UI are not saved
From defaults:
If no variables are defined from the above methods, the defaults will be used.
Lists#
Implicitly:
variable "cidrs" { default = [] }
Explicitly:
variable "cidrs" { type = list }
To specify a list in terraform.tfvars:
cidrs = [ "10.0.0.0/16", "10.1.0.0/16" ]
Maps#
Unfortunately, AMIs are specific to the region that is in use. Maps are a way to create variables that are lookup tables.
variable "amis" {
    type = "map"
    default = {
        "us-east-1" = "ami-b374d5a5"
        "us-west-2" = "ami-4b32be2b"
    }
}
To use it, replace the AWS instance with:
resource "aws_instance" "example" {
    ami           = var.amis[var.region]
    instance_type = "t2.micro"
}
Maps can also be set from the command line with:
terraform apply -var 'amis={ us-east-1 = "foo", us-west-2 = "bar" }'
Output Variables#
When building potentially complex infrastructure, Terraform stores hundreds or thousands of attribute values for all your resources but you may only be interested in a few values of importance.
Outputs are a way to tell Terraform what data is important
This data is outputted when apply is called, and can be queried using the terraform output command.
Let’s define an output for the public IP of elastic ip:
output "ip" {
    value = aws_eip.ip.public_ip
}
After running terraform apply you will see the output:
Apply complete! Resources: 2 added, 0 changed, 0 destroyed.

Outputs:

ip = 3.9.152.24
You can also query the output after running apply with:
$ terraform output
ip = 3.9.152.24
This command is useful for scripts to extract outputs
Modules#
UP till now we’ve been configuring terraform by editing terraform configs directly. As infrastructure grows there are a few key problems:
- lack of organisation
- lack of reusability
- difficulties in management for teams
Modules in Terraform are self-contained packages of Terraform configurations that are managed as a group. * create reusable components * improve organization * treat pieces of infrastructure as a black box
Using Modules#
There is a terraform registry of ready to use modules for common purposes. In this example we will use the Consul terraform module for AWS which will setup a complete consul cluster.
Ensure that you use the verified modules written by Hashicorp as the first port of call:
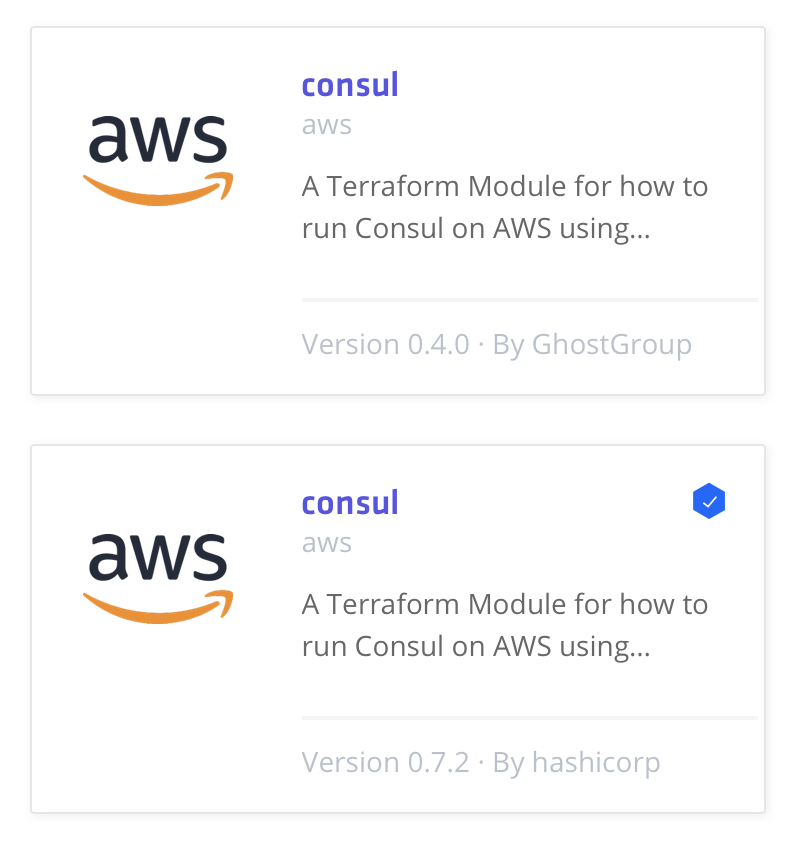
View and use the module config given by the terraform registry page
terraform {
    required_version = "0.11.11"
}

provider "aws" {
    access_key = "AWS ACCESS KEY"
    secret_key = "AWS SECRET KEY"
    region     = "us-east-1"
}

module "consul" {
    source      = "hashicorp/consul/aws"
    num_servers = "3"
}
Modules can be retrieved from anywhere, in this case it is from the official terraform registry
After adding a new module to configuration, it is necessary to run (or re-run) terraform init
This was going to cost me money so I stopped it
Remote State Storage#
You have now seen how to build, change, and destroy infrastructure from a local machine. This is great for testing and development, but in production environments it is more responsible to share responsibility for infrastructure
The best way to do this is by running Terraform in a remote environment with shared access to state.
You need to setup remote backends
Hashicorp recommends using Terraform Cloud
For the tutorial we’ll use terraform cloud
Configure your backend with your own organisation and wordspace names:
terraform {
    backend "remote" {
        organization = "Cloud-Org"

        workspaces {
            name = "Dev-QA"
        }
    }
}
The backend section configures the backend to use.
Use terraform init to setup terraform
If you want to move back to local state, you can remove the backend configuration block from your configuration and run terraform init again
- You can use it with a version controlled workflow to automatically queue plans when changes are commited to the repo
- An API driven workflow where a CI pipeline can upload configurations directly
- Create a terraform cloud account
- Create an organisation and workspace
-
Create an access token and add it to
~/.terraformrccredentials “app.terraform.io” { token = “....” }
-
Add the backend to your config
- Reinitialise:
terraform init
It should say:
Successfully configured the backend "remote"! Terraform will automatically
use this backend unless the backend configuration changes.
- Apply
terraform apply
The state is now saved in terraform cloud
Using Multiple Tools Together#
Provisioning plus configuration management#
You use Terraform to deploy all the underlying infrastructure, including the network topology (i.e., VPCs, subnets, route tables), data stores (e.g., MySQL, Redis), load balancers, and servers. You then use Ansible to deploy your apps on top of those servers.
Many ways to get Ansible and Terraform to work together (e.g., Terraform adds special tags to your servers and Ansible uses those tags to find the server and configure them). Downside is maintenance with ansible is procedural.
Provisioning plus server templating#
You use Packer to package your apps as virtual machine images. You then use Terraform to deploy (a) servers with these virtual machine images and (b) the rest of your infrastructure, including the network topology (i.e., VPCs, subnets, route tables), data stores (e.g., MySQL, Redis), and load balancers. This is an immutable infrastructure approach, which will make maintenance easier. Downside is virtual machines take long to deploy and the deployment strategies available are limited.
Provisioning plus server templating plus orchestration#
Terraform, Packer, Docker, and Kubernetes. You use Packer to create a virtual machine image that has Docker and Kubernetes installed. You then use Terraform to deploy (a) a cluster of servers, each of which runs this virtual machine image and (b) the rest of your infrastructure, including the network topology (i.e., VPCs, subnets, route tables), data stores (e.g., MySQL, Redis), and load balancers. Finally, when the cluster of servers boots up, it forms a Kubernetes cluster that you use to run and manage your Dockerized applications.
Downside: Added complexity.
- Providers - resources and infrastructure we can interact with - AWS, Azure, Docker, Github, GCP and vSphere - it uses API interactions
- Resources - What you are creating - virtual switches, data stores, licensing etc.
Stages of terraform:
1. Write declarative code and terraform plan - shows what code is going to do
2. terraform apply - actually does change
3. terraform destroy
Download Terraform#
Download and Install Terraform
It is a single file (executable/binary)
Terraform and Junos NRE Tutorial#
Terraform enables you to easily and predictably plan, create, update and destroy infrastructure resources in a graph based and network CLI free way
It is thought of more as a cloud provisioner
Declarative versions of the resources that can be version controlled, opposed to procedural tools like ansible which do not give you an idea of state.
Terraform for traditional networking is relatively unchartered ground because we don’t think about switches, routers or firewalls as a set of immutable resources, or put in another way, things that can be created and destroyed easily
terraform init
As you would expect, this is idempotent and can be done multiple times and safely.
Terraform maintains state files for resource state. This is a source of truth that can inspected and manipulated through the Terraform application
You can view the data graphically with: terraform graph -type=plan
You can create a .png based on that output: terraform graph -type=plan | dot -Tpng > plan_graph.png
You can check the current state with cat terraform.tfstate
If you run terraform plan and current state is the same as what is configured you will have No changes. Infrastructure is up-to-date
When deleting resources it is important to keep things in folders, for example a customer has their own folder:
So when you do a terraform destroy the correct resources are removed
What if someone manually changed a config:
attrition: reduction in workforce due to resignations, retirement, sickness, or death
With terraform you are covered, even if manual entries were changed.
Using a variable of another resource:
${junos-qfx_vlan.vlan42_deep_thought.vlan_num}
Human Error#
When humans get involved in troubleshooting, we have a tendency to change a bunch of stuff without clearing up 100% afterwards. When this happens with Terraform configured resources, the Terraform state cache could get out of sync with reality and luckily there is a way to sync it back up.
Use terraform refresh
Refresh performs a read of the resources and updates the state cache
Parital Delete#
What happens if you don’t want to destroy everything and just delete a single resource:
terraform delete -h
You can use the -target to target a specific resource
Terraform in Reality#
It is not mature yet#
- It’s major version is still 0, means it is not production ready and is under active development.
It is not cloud-agnostic#
You do not describe your infrastructure with generic code applicable on multiple providers - it has specific code per provider.
It does not hide the complexity of the underlying provider#
If you don’t know the components and how AWS works, terraform won’t make your life easier. You will have to deal with both AWS and terraform quirks.
AWS has global and regional resources:
- EC2 is regional, an auto-scaling group in Virginia has nothing to do with one in Sao Paulo - they can have the same name (asg)
IAMis global - meaning a role can be used anywhere.S3is hybrid - it has regional scope but a global namespace - meaning no buckets with the same name across regions